Rabbit 2000: The Quirky 8‑bit Heart That Refused to Quit

If you grew up around microcontrollers, you probably remember the era when “8‑bit” didn’t mean retro—it meant practical. In that world, the Rabbit 2000 carved out a surprisingly durable niche. It never grabbed headlines like the 8051 or AVR, but it quietly powered industrial controls, embedded gateways, and all kinds of “it just works” hardware.
This post takes a look at what the Rabbit 2000 is, why it existed in the first place, what made it interesting, and why it still matters if you care about embedded systems design.
What Is the Rabbit 2000?
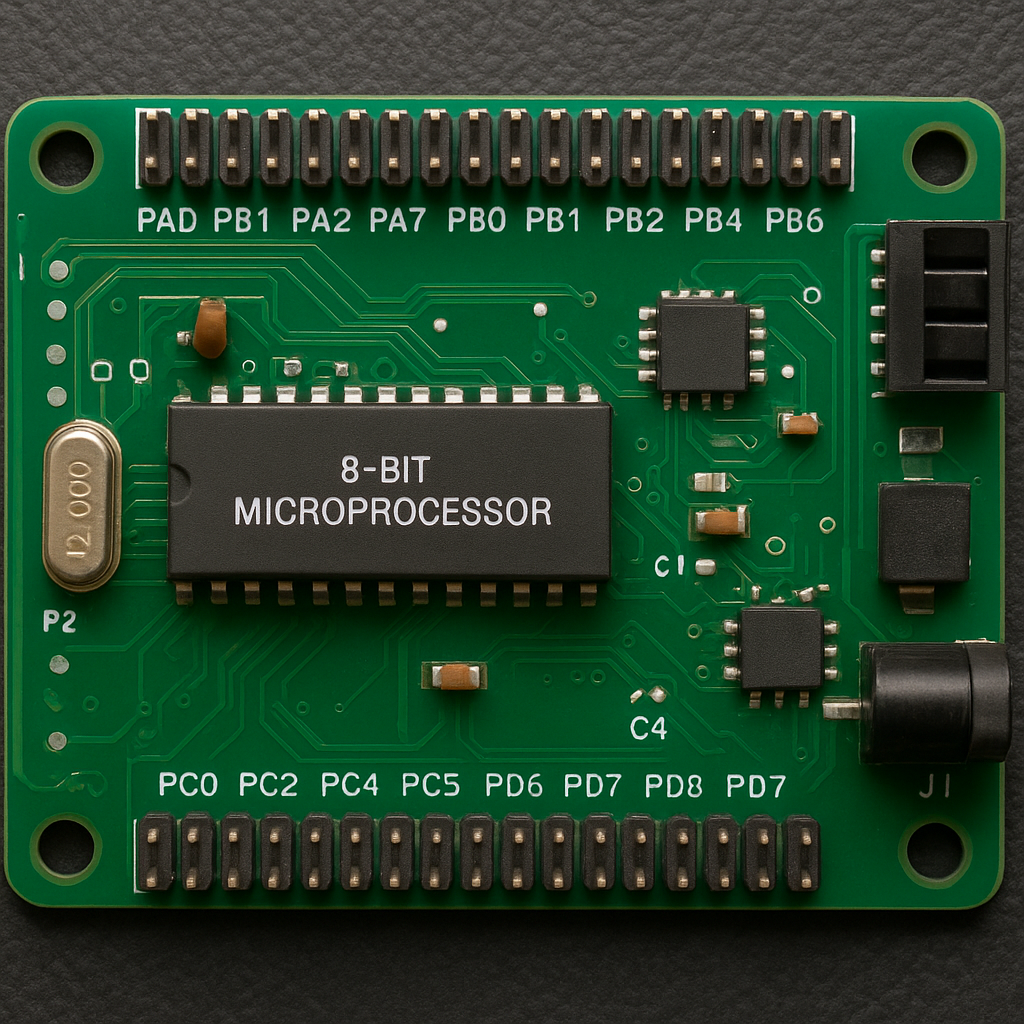
At its core, the Rabbit 2000 is an 8‑bit microprocessor designed for embedded control, created by Rabbit Semiconductor (later part of Digi International). It’s strongly inspired by the Zilog Z80 but adds a range of enhancements aimed squarely at embedded developers rather than general-purpose computing.
In plain terms, it offers:
- An 8‑bit CPU with a Z80-like instruction set (but not binary compatible)
- A relatively generous address space for an 8‑bit design (with paging schemes)
- A focus on deterministic timing and control logic
- A surrounding ecosystem of modules, tools, and libraries
You wouldn’t use a Rabbit 2000 to run Linux or heavy networking stacks today, but you would have used it in the late 1990s and early 2000s to build robust industrial devices, control systems, and small communicators with relatively low power and cost.
Why Another 8‑bit CPU in a 32‑bit World?
By the time the Rabbit 2000 appeared, 32‑bit architectures were already well established. So why did Rabbit Semiconductor double down on 8‑bit?
Because in embedded design, “enough” is often better than “more”.
The project reality for many engineers looked like this:
- Tight cost constraints
- Modest performance needs (read sensors, drive I/O, simple protocol handling)
- Limited power budgets
- A strong preference for predictable, easy-to-understand behavior
In that space, 8‑bit controllers could be:
- Cheaper (both in BOM and development time)
- Deterministic in timing
- Comfortable in small ROM/RAM footprints
The Rabbit 2000 specifically tried to give engineers familiar with Z80-style programming a more modern, embedded‑friendly evolution, without jumping all the way to a 32‑bit RISC core and a much heavier toolchain.
Rabbit 2000 CPU Architecture in Detail
This section goes deeper into how the CPU core and memory system are structured, and what it means for low-level programming.
Register Set
The Rabbit 2000 keeps a Z80-like flavor but with its own twists:
-
Accumulator and flags:
A: 8‑bit accumulator, used for most arithmetic/logic.F: flags register (Z, C, S, P/V, H, N), used for conditional branches and arithmetic state.
-
General-purpose register pairs (16‑bit, also accessible as 8‑bit halves):
BC,DE,HL: classic Z80-style register pairs for data manipulation and addressing.- Often,
HL(or equivalent) is used as an indirect memory pointer.
-
Index/Pointer registers:
- Typically two 16‑bit index registers (similar to Z80
IX/IY) for frame pointers, table lookups, etc. - Stack pointer
SPas a 16‑bit register, growing downward in memory.
- Typically two 16‑bit index registers (similar to Z80
-
Program counter:
PCis 16 bits, but the effective address space can be extended via paging (see below).
The key point for programming: you get a rich set of 16‑bit operations in an 8‑bit world, which makes C and high-level languages much less painful than on very minimal 8‑bit cores.
Instruction Set and Timing
The instruction set is broadly similar to the Z80, but:
- Not fully opcode‑compatible (you can’t just drop Z80 binaries onto it).
- Includes extended opcodes for memory and bit operations that are common in embedded control.
- Has relatively short and predictable instruction timings, typically described in clock cycles per instruction.
For firmware authors, that means you can:
- Write cycle-counted routines (for bit-banged protocols, precise delays, etc.).
- Rely on deterministic interrupt latency and ISR execution time (as long as you keep ISRs short).
In tight loops, a Rabbit 2000 can feel noticeably faster than an original Z80 at the same clock because of improved instruction sequencing and optimizations.
Clock and Bus Interface
Typical features (exact values depend on variant and board design):
- External crystal/oscillator input, often in the tens of MHz range.
- An internal clock divider/PLL to produce the CPU core clock.
- A multiplexed address/data bus in many designs, plus standard control signals:
RD,WR,MREQ,IORQ,RESET, etc.
You generally hook it up to:
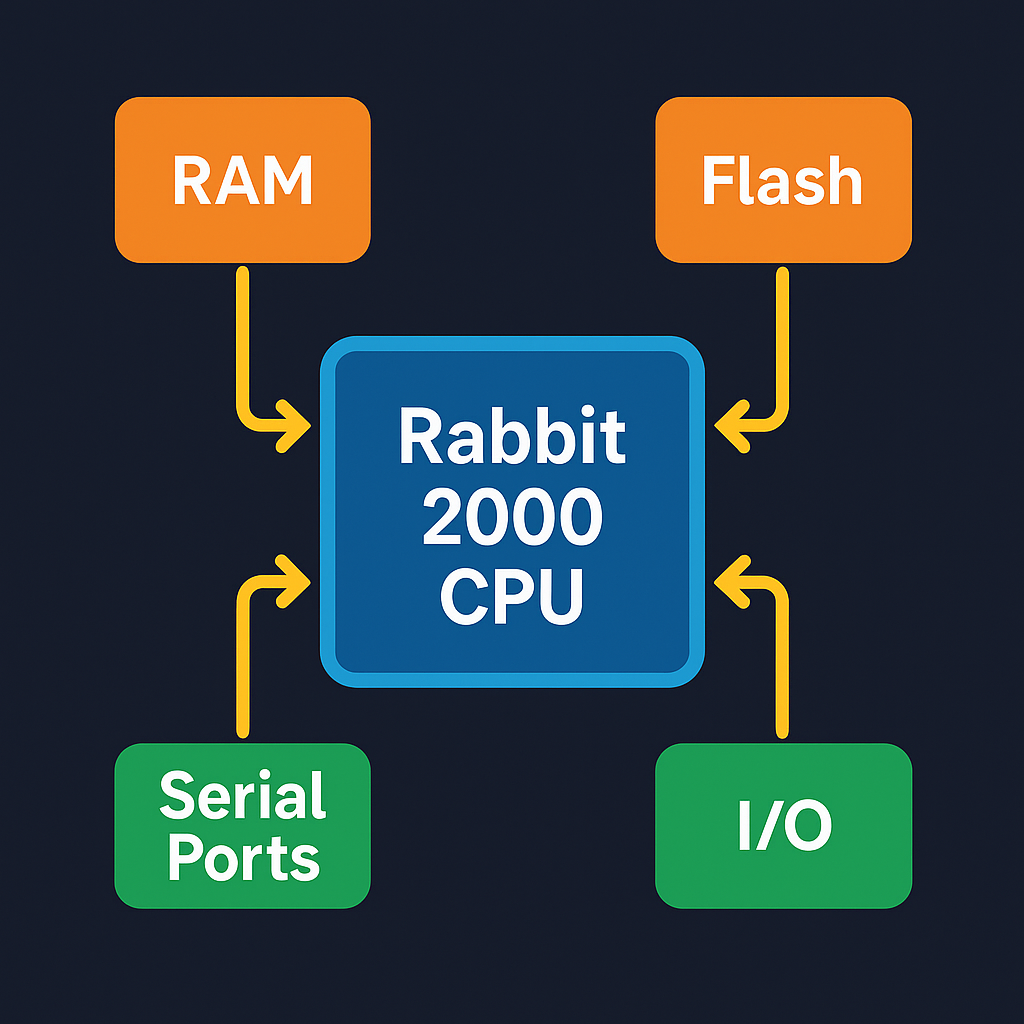
- External SRAM for data.
- External Flash/EPROM for program memory.
- Optional memory-mapped devices or I/O latches.
On development modules, all of this is already done for you; you just see headers/pins for GPIO, UART, etc.
Memory Map and Paging
One of the more interesting aspects is how Rabbit handles memory:
- The core is fundamentally 16‑bit addressed (64 KiB window).
- To access more memory, the CPU uses paging/banking registers:
- Certain high regions of the 64 KiB logical space can be mapped to different “pages” of physical memory.
- Control registers let you select which physical page is currently visible.
This gives you:
- A flat, simple 64 KiB view from the CPU’s perspective at any instant.
- The ability to switch code/data segments in and out as needed (e.g. separate banks for bootloader, application, file system buffers, etc.).
From a C programmer’s point of view, the toolchain typically hides most of this via:
- A memory model (small/large/huge) that dictates how pointers and far calls are generated.
- Linker script / memory configuration that assigns code and data to specific pages.
Interrupts and Timers
For embedded work, the interrupt model matters more than raw MIPS.
Rabbit 2000 typically offers:
-
Multiple interrupt sources:
- External pins (for critical events, encoders, etc.).
- On-board timers.
- Serial ports and other peripherals.
-
A vector table or a fixed entry point with a dispatch table:
- Depending on configuration, each source can vector to its own ISR or share a common handler.
-
Several hardware timers/counters:
- Free-running timers for tick generation.
- Compare/Match modes for periodic interrupts.
- Often used to implement:
- System tick (software scheduler)
- Timeouts and protocol timers
- PWM or precise pulse generation
At startup, you typically:
- Configure timer prescalers and reload values.
- Enable the timer interrupt and set the ISR address.
- Globally enable interrupts.
Then your main control loop runs in the background, while time‑critical work happens in ISRs.
Programming the Rabbit 2000
Now to the fun part: how you actually write and load code on the chip.
Toolchain and Languages
Historically, Rabbit provided its own C-centric toolchain, often known as Dynamic C (plus assembler and linker underneath). In practice you usually work in:
- C for most application logic.
- Assembly for:
- Startup code and low-level initialization.
- Hand-optimized inner loops.
- Very small or timing-critical ISRs.
The setup looks like a typical embedded C environment:
-
A compiler that knows about:
- The paging model.
- Special function registers and I/O addresses.
- Calling conventions for far/near functions.
-
A linker that places:
- Boot code in a non-paged or special page.
- Application code and const data into appropriate banks.
- Variables and stacks into RAM banks.
Memory Model and C Considerations
Because of paging, the C environment usually defines:
-
Different pointer types:
- “Near” pointers that assume a default page.
- “Far” pointers that include page information.
-
Possibly different function qualifiers, like:
farfor functions that might live in different banks.interruptfor ISRs with special prologue/epilogue.
As a firmware developer, you need to:
- Be aware of which objects can safely be in paged memory.
- Avoid putting frequently-used code in a page that gets swapped in and out.
- Keep ISRs and boot code in non-paged or always-visible sections.
The toolchain’s default project templates usually give you a sane layout to start from; you only tweak when optimizing or adding more modules.
Startup Sequence
A typical Rabbit 2000 startup flow (greatly simplified) looks like:
-
Reset:
- CPU sets
PCto the reset vector (often near address 0). - Hardware configuration pins (if any) are sampled.
- CPU sets
-
Low-level init (assembly):
- Configure CPU mode and paging registers for a basic map.
- Initialize stack pointer(s).
- Possibly copy initialized data from Flash to RAM.
- Zero out
.bss(C global variables that start at 0).
-
C runtime init:
- Call global/static constructors (if used).
- Initialize the standard library core.
-
Jump to
main():- Your user code begins.
From that point, your main() typically:
- Sets up clocks, timers, and peripherals.
- Enables interrupts.
- Enters a
while (1)main loop handling non‑critical tasks.
Typical Project Structure
A small Rabbit 2000 project in C often looks like:
// hw_config.h
#define UART_BAUD 115200
// GPIO pin defines, chip selects, etc.

// isr.c
#pragma interrupt
void timer0_isr(void) {
    // Clear interrupt flag
    // Update system tick / scheduler
}

// main.c
#include "hw_config.h"

void init_hardware(void) {
    // Configure clock
    // Setup GPIO directions
    // Initialize UART
    // Configure Timer0 for system tick
}

int main(void) {
    init_hardware();
    enable_interrupts();

    for (;;) {
        // Main loop:
        //  - Handle non-time-critical tasks
        //  - Process protocol state machines
        //  - Enter low-power mode if supported/needed
    }
}
Behind the scenes the compiler and linker map:
-
timer0_isr to the correct interrupt vector.
-
init_hardware and main into code pages.
-
Globals into RAM pages.
Downloading and Debugging Code
On most Rabbit 2000-based dev boards and modules, you don’t directly talk to external Flash yourself for development; instead you use:
A serial or USB cable to a dedicated programming interface._ The vendor IDE / loader software to:
-    Reset the target.

-    Place the CPU in a boot/loader mode.

-    Download the binary over a simple protocol.

-    Program external Flash and verify.
The same connection is often used for debugging:
Breakpoints and single-stepping (via software traps or debug monitors).

Inspecting and modifying memory/registers.

Printing debug information over a serial UART (the classic printf-to-serial workflow).
In production, you might:
Pre-program the external Flash.

Use an in-circuit programming header on your custom board.

Or build a custom bootloader to accept firmware updates over network or field bus.
Where You’d Find Rabbit 2000 in the Real World
Typical Rabbit 2000 deployments looked like this:
Industrial controllers: Reading sensors, managing actuators, handling local logic, and speaking protocols like Modbus or proprietary fieldbuses.

Building automation: HVAC control boards, access control units, and environmental monitoring systems.

Serial-to-something gateways: Small boxes bridging legacy serial equipment to other interfaces or networks.

Legacy modernizations: Replacing older Z80‑based boards with something faster and more integrated, while reusing concepts or code.
In all of these roles, the Rabbit 2000 didn’t need to be glamorous. It just needed to be:
-
Predictable
-
Reliable
-
Easy enough for embedded engineers to get working quickly
Why It Still Matters (Even If You’ll Never Ship One)
Even if you never touch a Rabbit 2000 in production, it’s still a useful piece of the embedded story.
- It Teaches “Right-Sized” Design
Modern hobby projects jump straight to 32‑bit MCUs with huge Flash, RAM, and full RTOSes. That’s fine, but it can obscure an important engineering lesson:
Use the smallest, simplest thing that cleanly solves the problem.
The Rabbit 2000 era forced you to:
Think in terms of tight loops and fixed memory budgets

Care about exact instruction timing and ISR latency

Strip away code and features that didn’t earn their place
Those habits still pay off today, especially in safety-critical or ultra‑low‑power systems. 2. It Bridges Old and New Embedded Worlds
Rabbit 2000 sits at a crossroads:
Architecturally close to vintage 8‑bit CPUs like the Z80

Packaged and supported more like a modern embedded platform
Studying it helps explain how we went from “bare 8‑bit CPU plus glue logic” to highly integrated MCUs, and why patterns like:
Interrupt Service Routines

Watchdogs

Co‑operative schedulers

Manual memory management
still show up in embedded firmware today. 3. It Shows the Power of Ecosystems
The chip itself was only part of the offering; the real value was the combination of:
Silicon

Development hardware

Toolchain

Libraries
That’s the same pattern that powers today’s platforms: Arduino, Raspberry Pi, ESP32 modules, and STM32 Nucleo boards don’t just sell silicon—they sell productivity.
Rabbit 2000 was an early, industrial‑focused example of this mindset. Experimenting with “Rabbit 2000‑Style” Design Today
Finding actual Rabbit 2000 hardware now may be tricky or expensive, but you can still explore the design style:
Pick a small 8‑bit MCU (AVR, PIC, etc.).

Impose tight limits on yourself: small Flash, small RAM, no RTOS.

Write a simple main loop with a few ISRs.

Implement a small fixed protocol handler or control algorithm.
Focus on:
Deterministic timing: know roughly how long each code path takes.

Predictable failure modes: watchdogs, safe defaults, and fail‑safe states.

Minimalism: every feature should justify its cost in bytes and cycles.
That’s the essence of working with something like the Rabbit 2000—without needing vintage parts. Closing Thoughts
The Rabbit 2000 was never meant to be glamorous. It was designed to sit quietly on a PCB, year after year, doing one job extremely reliably. Seen through that lens, it’s a great reminder that embedded engineering is about fitness for purpose, not raw specs.
Whether you’re maintaining legacy hardware, learning about classic architectures, or just trying to sharpen your embedded design thinking, the Rabbit 2000 is a fascinating snapshot of a transitional moment in microcontroller history—when 8‑bit was still “enough,” and good tools around a chip could make all the difference.
Why Another 8‑bit CPU in a 32‑bit World?
By the time the Rabbit 2000 appeared, 32‑bit architectures were already well established. So why did Rabbit Semiconductor double down on 8‑bit?
Because in embedded design, “enough” is often better than “more”.
The project reality for many engineers looked like this:
- Tight cost constraints
- Modest performance needs (read sensors, drive I/O, simple protocol handling)
- Limited power budgets
- A strong preference for predictable, easy-to-understand behavior
In that space, 8‑bit controllers could be:
- Cheaper (both in BOM and development time)
- Deterministic in timing
- Comfortable in small ROM/RAM footprints
The Rabbit 2000 specifically tried to give engineers familiar with Z80-style programming a more modern, embedded‑friendly evolution, without jumping all the way to a 32‑bit RISC core and a much heavier toolchain.
Architecture Highlights (Without Drowning in Opcodes)
You can think of Rabbit 2000 as “Z80, but tuned for embedded”. While the details can get very deep, a few conceptual aspects stand out.
Familiar Instruction Style
Rabbit 2000 reuses a Z80‑like assembly style and concepts:
- 8‑bit registers with 16‑bit operations for addressing and arithmetic
- Rich bit-manipulation and branch instructions
- Good support for tight, efficient control loops
For developers migrating from older Z80-based systems, this meant a relatively gentle learning curve.
Improved Performance and Efficiency
Compared to a classic Z80, the Rabbit 2000 offered:
- Higher clock speeds
- Optimized instruction timings
- Extra instructions that cut instruction count for typical embedded tasks
Effectively, you could do more work at the same (or lower) power draw and still meet strict timing budgets for real-time control.
Embedded-Friendly Memory and I/O
Where the Rabbit 2000 really differed from a plain CPU core was in how it was packaged and supported for embedded applications:
- Flexible external memory support (SRAM/Flash)
- Paging schemes to extend effective address space
- Tight coupling with I/O and control signals for deterministic behavior
It wasn’t a microcontroller in the modern “every peripheral on-die” sense like a contemporary AVR or STM32, but it was absolutely built with embedded tasks in mind.
Tooling and Ecosystem: Not Just a Bare Chip
One of the Rabbit 2000’s strengths was the surrounding ecosystem. Rabbit didn’t just ship bare silicon and say “have fun.” They provided:
- Development boards and modules (for example, RabbitCore-style boards)
- An integrated development environment and toolchain
- Libraries for serial communication, I/O, and, in later families, networking stacks
This mattered because it solved a classic embedded pain point: going from “I have a chip” to “I have a working product” quickly.
Instead of:
- Designing your own full board from scratch on day one
- Writing every single low-level driver yourself
You could:
- Start from a ready-made module
- Reuse proven libraries for UART, GPIO, timers, and protocol handling
- Move to a custom PCB only when your design stabilized
Where You’d Find Rabbit 2000 in the Real World
Typical Rabbit 2000 deployments looked like this:
- Industrial controllers: Reading sensors, managing actuators, handling local logic, and speaking protocols like Modbus or proprietary fieldbuses.
- Building automation: HVAC control boards, access control units, and environmental monitoring systems.
- Serial-to-something gateways: Small boxes bridging legacy serial equipment to other interfaces or networks.
- Legacy modernizations: Replacing older Z80‑based boards with something faster and more integrated, while reusing concepts or code.
In all of these roles, the Rabbit 2000 didn’t need to be glamorous. It just needed to be:
- Predictable
- Reliable
- Easy enough for embedded engineers to get working quickly
Why It Still Matters (Even If You’ll Never Ship One)
Even if you never touch a Rabbit 2000 in production, it’s still a useful piece of the embedded story.
1. It Teaches “Right-Sized” Design
Modern hobby projects jump straight to 32‑bit MCUs with huge Flash, RAM, and full RTOSes. That’s fine, but it can obscure an important engineering lesson:
Use the smallest, simplest thing that cleanly solves the problem.
The Rabbit 2000 era forced you to:
- Think in terms of tight loops and fixed memory budgets
- Care about exact instruction timing and ISR latency
- Strip away code and features that didn’t earn their place
Those habits still pay off today, especially in safety-critical or ultra‑low‑power systems.
2. It Bridges Old and New Embedded Worlds
Rabbit 2000 sits at a crossroads:
- Architecturally close to vintage 8‑bit CPUs like the Z80
- Packaged and supported more like a modern embedded platform
Studying it helps explain how we went from “bare 8‑bit CPU plus glue logic” to highly integrated MCUs, and why patterns like:
- Interrupt Service Routines
- Watchdogs
- Co‑operative schedulers
- Manual memory management
still show up in embedded firmware today.
3. It Shows the Power of Ecosystems
The chip itself was only part of the offering; the real value was the combination of:
- Silicon
- Development hardware
- Toolchain
- Libraries
That’s the same pattern that powers today’s platforms: Arduino, Raspberry Pi, ESP32 modules, and STM32 Nucleo boards don’t just sell silicon—they sell productivity.
Rabbit 2000 was an early, industrial‑focused example of this mindset.
Experimenting with “Rabbit 2000‑Style” Design Today
Finding actual Rabbit 2000 hardware now may be tricky or expensive, but you can still explore the design style:
- Pick a small 8‑bit MCU (AVR, PIC, etc.).
- Impose tight limits on yourself: small Flash, small RAM, no RTOS.
- Write a simple main loop with a few ISRs.
- Implement a small fixed protocol handler or control algorithm.
Focus on:
- Deterministic timing: know roughly how long each code path takes.
- Predictable failure modes: watchdogs, safe defaults, and fail‑safe states.
- Minimalism: every feature should justify its cost in bytes and cycles.
That’s the essence of working with something like the Rabbit 2000—without needing vintage parts.
Closing Thoughts
The Rabbit 2000 was never meant to be glamorous. It was designed to sit quietly on a PCB, year after year, doing one job extremely reliably. Seen through that lens, it’s a great reminder that embedded engineering is about fitness for purpose, not raw specs.
Whether you’re maintaining legacy hardware, learning about classic architectures, or just trying to sharpen your embedded design thinking, the Rabbit 2000 is a fascinating snapshot of a transitional moment in microcontroller history—when 8‑bit was still “enough,” and good tools around a chip could make all the difference.
Comments
Join the conversation powered by GitHub Discussions.